We dream of having hours to leisurely craft perfectly-designed storage solutions we find on Pinterest, but sometimes we just need to get organized and on with our day! In less than an hour each, you can create these space-saving solutions and still have time to enjoy the summer.
Hidden Magnetic Tins Inside a Cabinet
This easy storage solution works great in a home office, playroom, or kitchen where small items are used often but need to be out of the way. The challenge is that most cabinet shelves flush close to the cabinet frame making it difficult to close the doors if anything is installed on them. The quick work-around is to shorten the shelf depth to provide more clearance for items on the door. To do it yourself, first install your storage solution on the cabinet door (we used a magnetic board and magnetic tins in the image below.) Next, measure the depth of extra clearance you’ll need after everything is in place (in our case 2.5 inches) and add about half an inch. Remove the cabinet shelf, measure and mark the amount you’ll be cutting off from the back of the shelf so the front finish remains intact. Cut your shelf to the desired depth. Finally, replace the shorted shelf and anchor it with heavy screws from underneath. Your doors should now close easily!
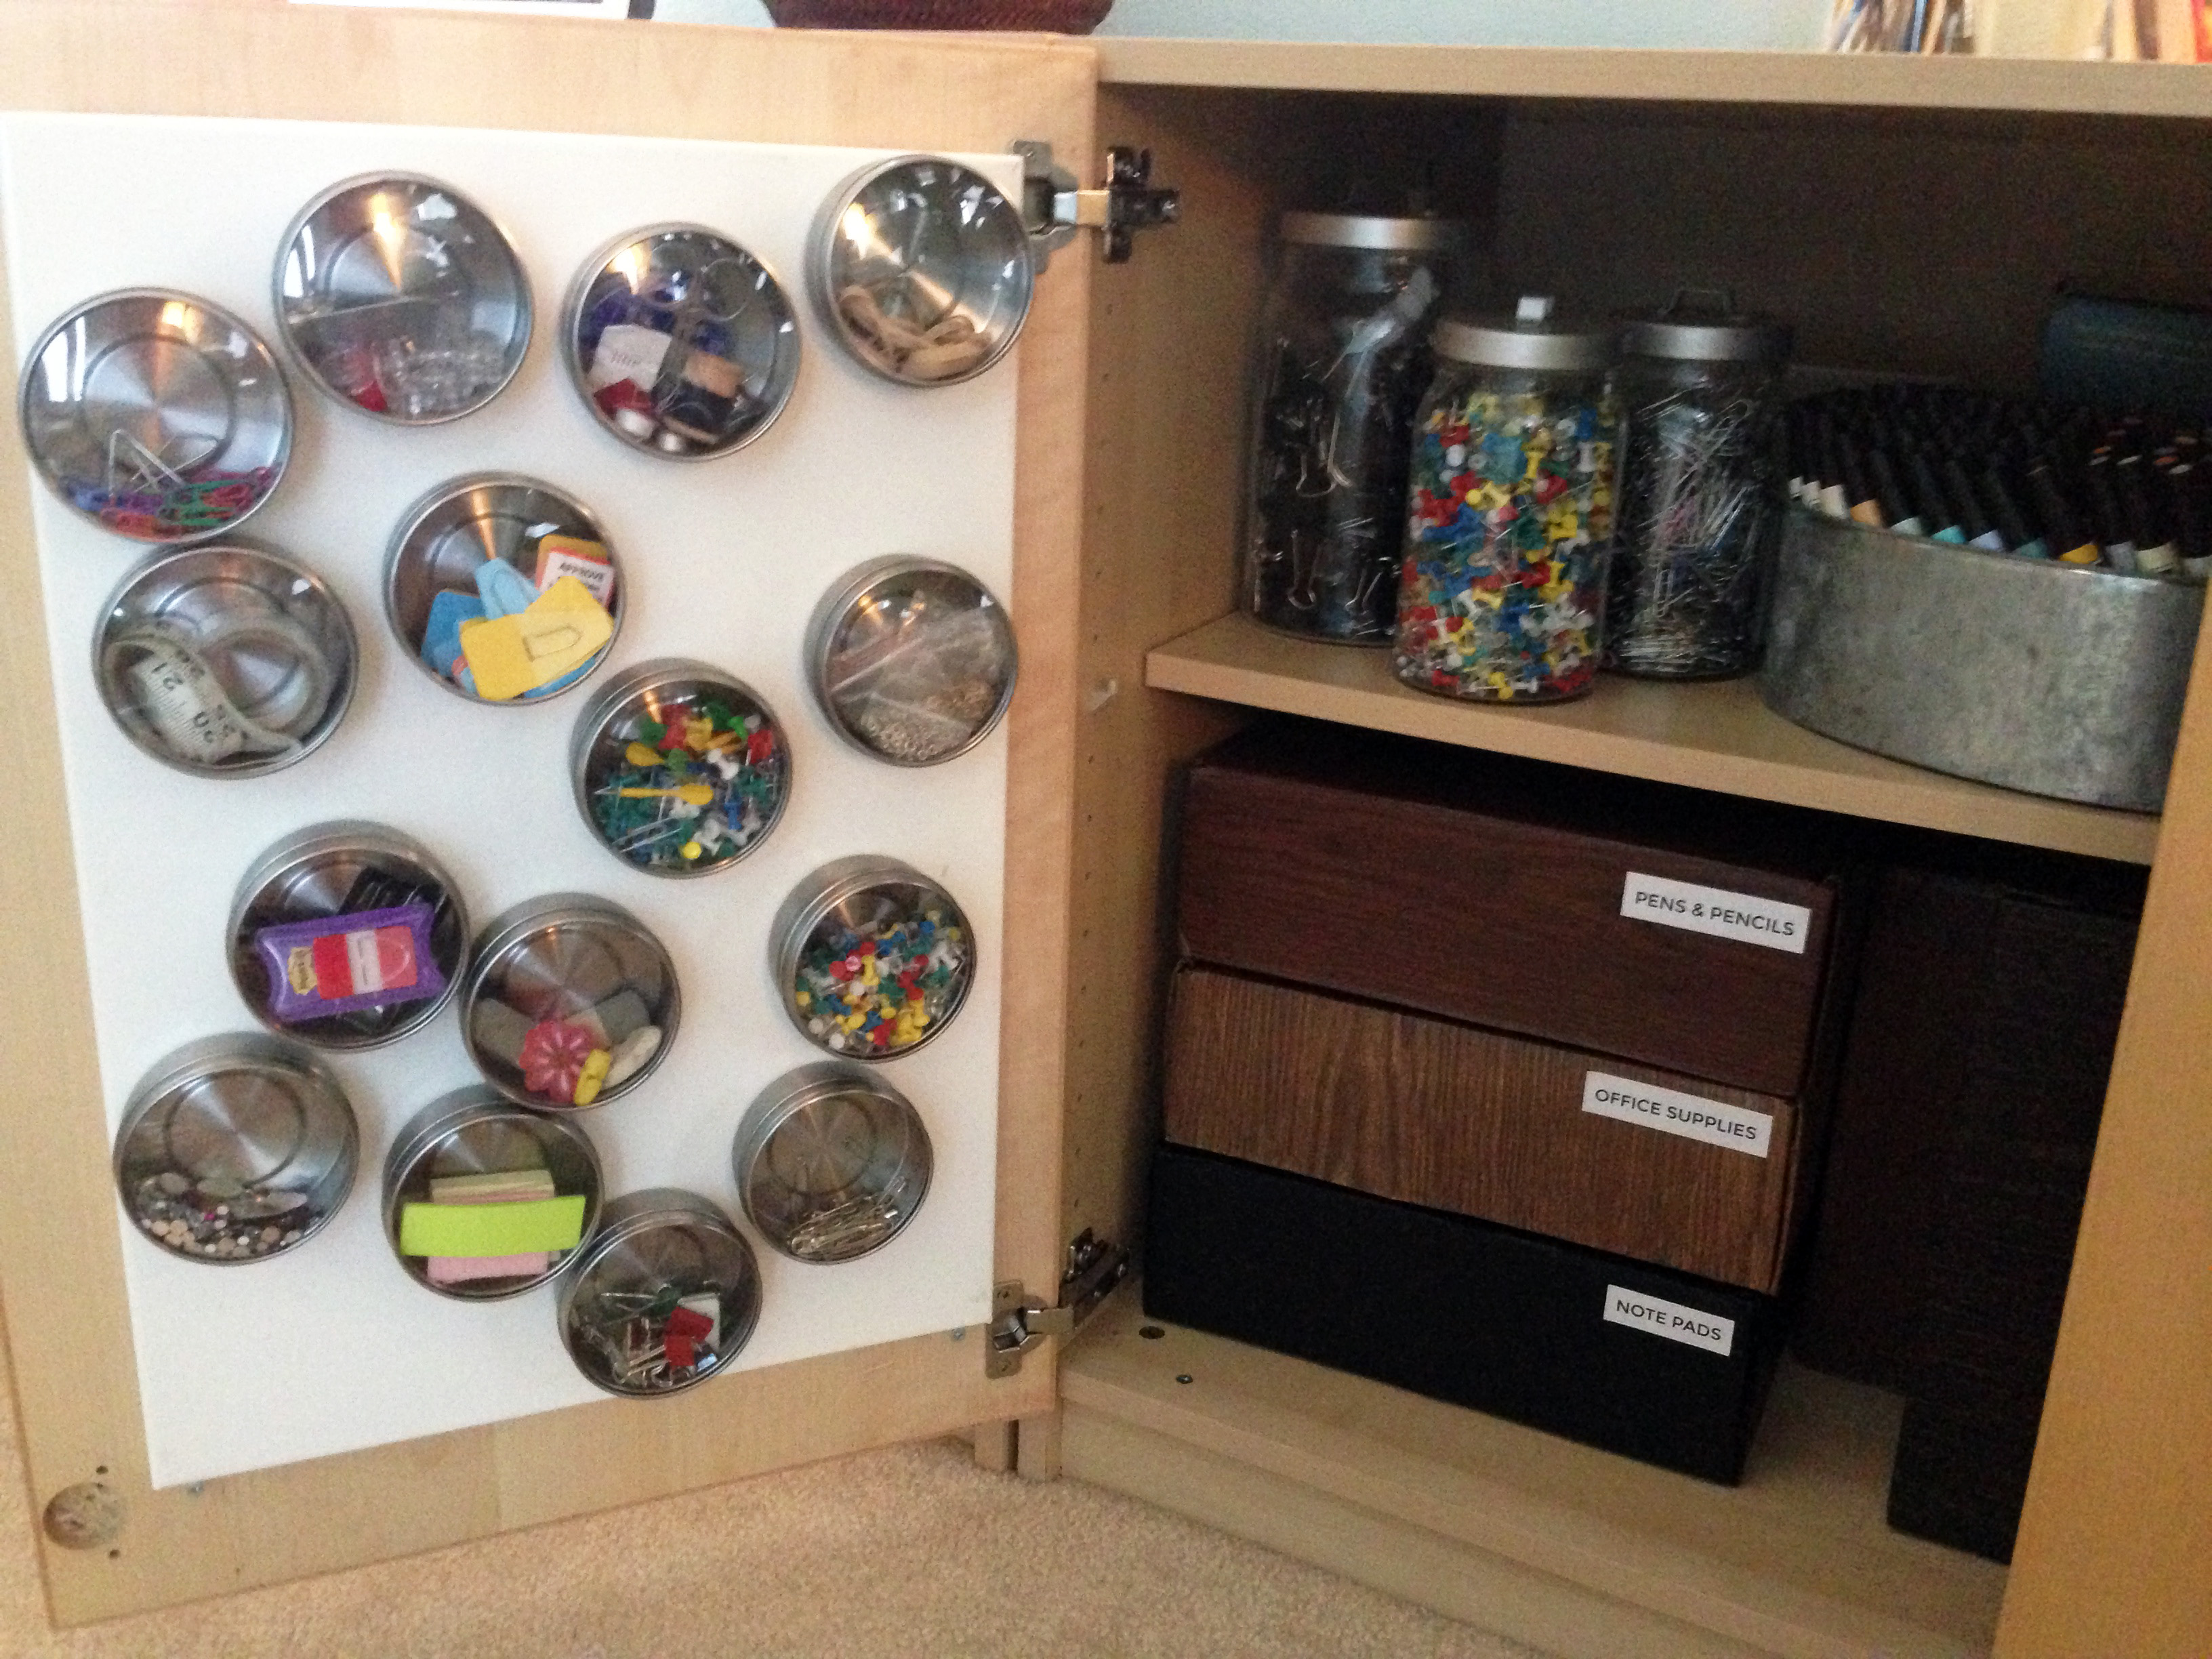
Photo: Cabinet. Photo Credit: Pfister Social
Reclaimed Pantry Space for Pots and Pans
Pantries with metal shelves offer a flexibility and strength but often leave underutilized area below the shelves. Metal “S” hooks are a perfect fit for hanging pots and pans to take advantage of this extra space. Not only does hanging the pans make them more accessible and easier to locate, but you’ll get back all the cabinet space they once occupied. (Added bonus: you no longer have to stack and unstack your heavy pans with each use saving a few back aches.) To do it yourself, purchase “S” hooks from your local home improvement store to accommodate the different sizes of handle holes on your pans (2 or 3 sizes should be enough.) Hang each hook from the wire shelf at different depths. Place your pans on the hooks with the most used toward the front.
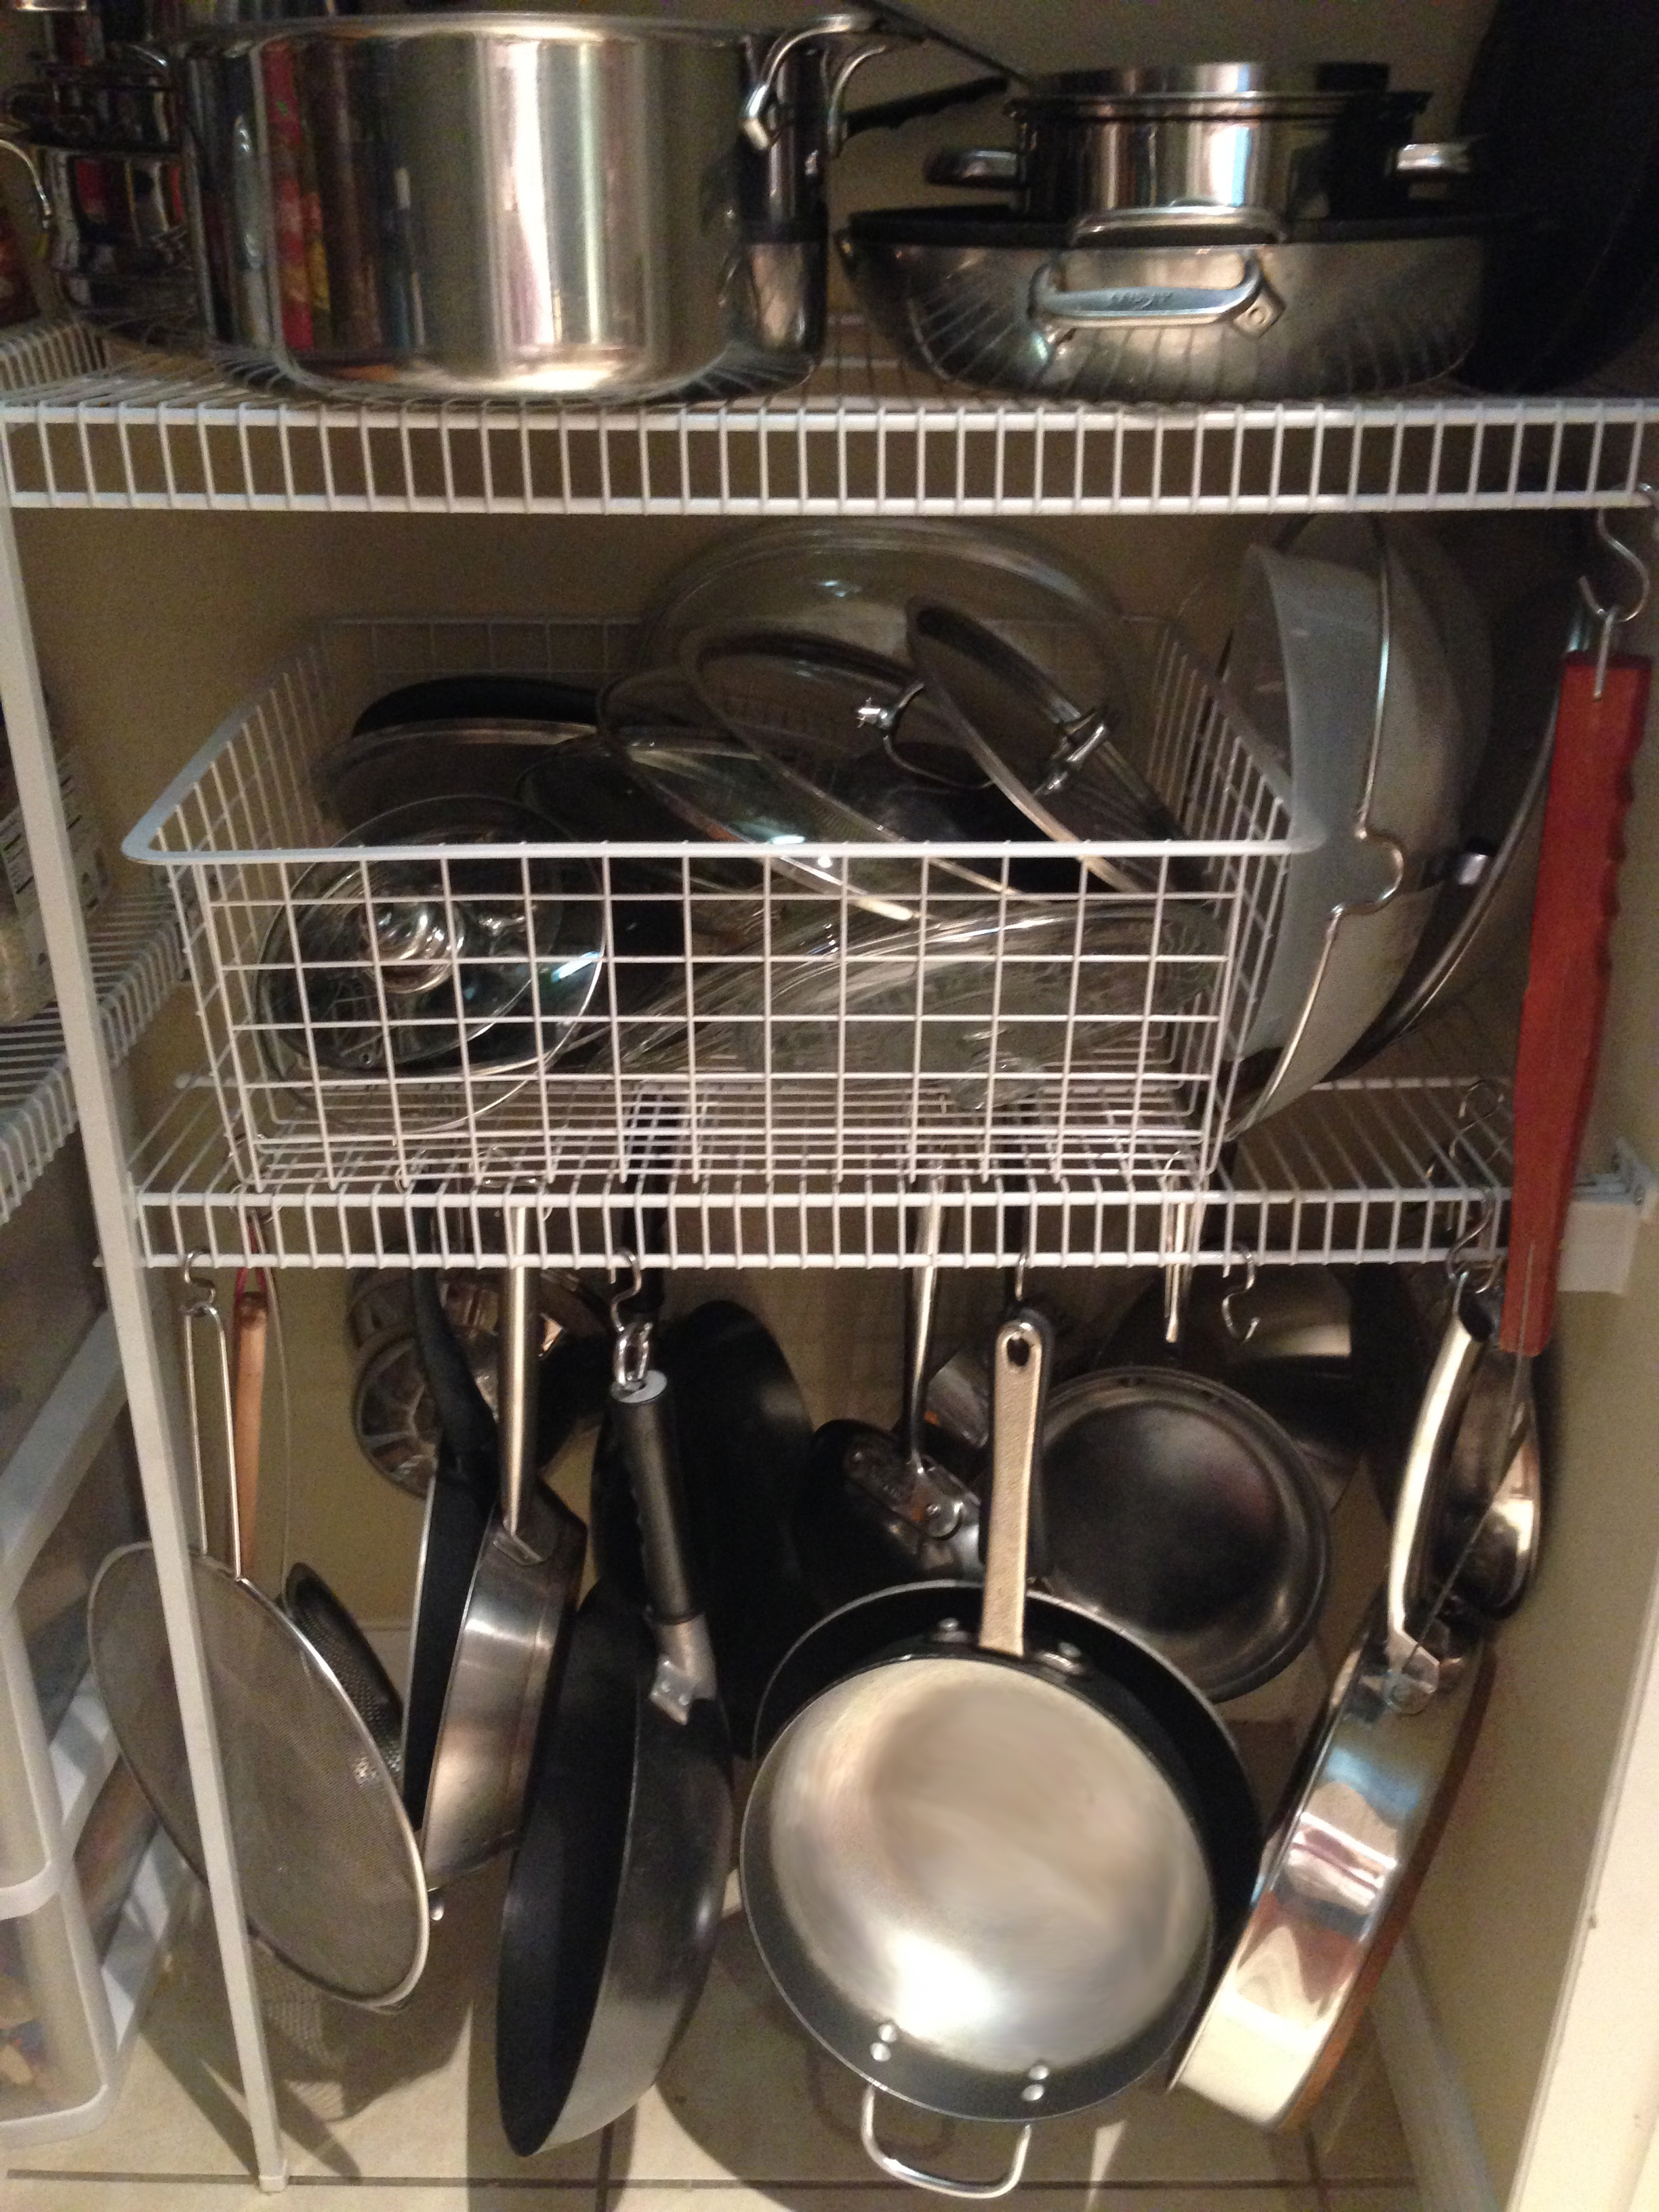
Photo: Pantry with hanging pots and pans. Photo Credit: Pfister Social
Crown Molding Shoe Storage
In bedroom closets shelf and hanging space is at a premium, however walls offer room to expand. One quick solution to taking advantage of wall space are these clever crown molding shoe shelves. To do it yourself, measure the wall space where you plan to install your shelves. For each shelf you will need two pieces of molding approximately 4-6 inches wide (style and detail are variable.) At least one of the boards should have a beveled edge which will allow it to lie flat against the wall board and create the gap against the wall for the shoes’ heels. To save time, bring your measurements to your home improvement store and have them cut the boards for you to the proper lengths making sure you have two pieces for each shelf. Standard moldings come pre-finished in white so you don’t need to paint (but of course you can!) With a level, mark the proper placement for your wall boards then install with screws. Next, align your beveled board against the flat wall board and join with wood glue and finishing nails. Allow the glue to dry and your shelves are ready to use!
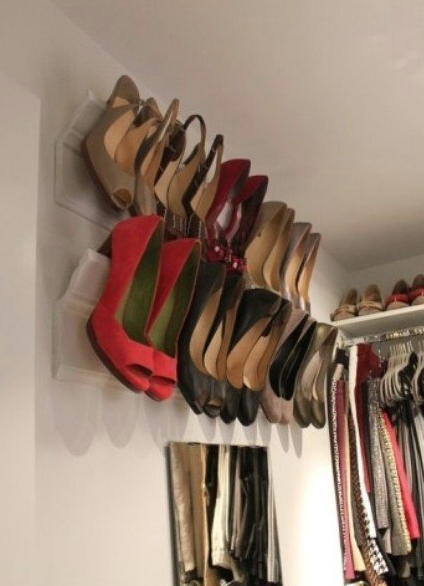
Photo: Crown Molding Shoe Shelves. Photo Credit: diyncrafts.com
I’d like to find out more? I’d like to find out more details.|
Howdy! Would you mind if I share your blog with my zynga group? There’s a lot of folks that I think would really enjoy your content. Please let me know. Thanks